|
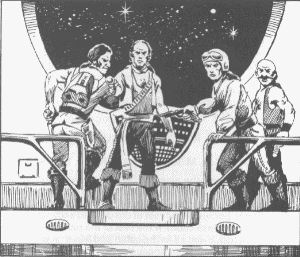
During your journey, you have toured the area of the ship not
shown on the map. It contains recreation areas, the
observation dome, the galley, the first class living quarters,
and fuel storage. There is nothing else of interest in that area.
In the event you must evacuate ship, you have been instructed
to proceed immediately to the escape bay, where two of the
Serena Dawn's lifeboats are stored. Each lifeboat holds up to
eight persons. If it becomes necessary to use the lifeboats,
you have been instructed not to open the hatch until all
persons using the lifeboat are assembled and ready to enter
it. This is because the lifeboats automatically launch one
minute after the hatch is opened. They then seek the nearest
inhabitable planet and land in the first safe spot. |
FOR THE REFEREE ONLY: If the characters insist on searching any area
of the ship not on the map, go directly to random encounter number 5.
GAMMA SUBSECTION 3: RANDOM ENCOUNTERS
After the pirates capture the ship, there is a 10% chance each turn
the characters will meet one or more of them. Roll 1d10 each turn. If
you roll a ''1," consult the random encounter table below. This table
is used sequentially, so encounter 1 takes place first, encounter 2
takes place second, and so on.
These encounters take place as soon as logically possible, ideally in
the same turn rolled. Do not, however, have pirates suddenly appear
where there is no chance they could appear. Pirates should appear as
the characters round a corner, open a door, or move into any area
not previously visible. If the characters are stationary, the pirates
should appear at the closest possible entrance.
GAMMA 3.1: RANDOM ENCOUNTERS TABLE
1.) Pirate A (RW -- , M 30, PS 3, IM 4, RS 35, STA 50.)
Pirate A will attack the closest character, attempting to hold this
character hostage. If he succeeds in grabbing any character, he will
draw a vibroknife and threaten to kill this character, attempting to
persuade the rest of the party to accompany him to a passenger-
class cabin. If the rest of the party cooperates, Pirate A will lock
them all in the cabin and leave. In this event, go immediately to
random encounter 5.
2.) Pirate B (RW -- , M 30, PS 3, IM 6, RS 55, STA 55.)
Pirate B will attack the closest character with his nightstick. As soon
as he has taken more than 20 points damage, he will attempt to flee
toward the bridge.
3.) Pirate C (RW 35, M28, PS2, IM6, RS 55, STA 35.)
Pirate C will attack the entire party with his automatic pistol. If he
hits, divide the damage according to the rules for firing a burst. If he
runs out of ammunition, he will attack with his gun butt until dead or
unconscious. He has enough ammunition to fire two bursts.
4.) Pirate D (RW 25, M 38, PS 4, IM 5, RS 45, STA 75.)
Pirate E (RW 35, M 18, PS 2, IM 7, RS 70, STA 35.)
Pirate D will throw his tangier grenade immediately. Any party
members within its range must make a Reaction Speed check. If the
check is successful, they must move 2 squares away from the center
of the tangier grenade explosion. If they fail the check, they are
affected normally by the tangier grenade. After throwing the tangier
grenade, pirate D will attack the closest party member with his
blackjack.
Pirate E has set his laser pistol energy dial at 2 SEU and will not
change it. He thus has a maximum of 10 shots. If he uses all h is
shots, he will melee using the pistol butt as a weapon.
5.) Ship explosions.
The ship begins to vibrate badly. The characters hear three loud
explosions, and the ship lurches. Each character must make a
Reaction Speed check or fall to the ground. The second turn, pieces of
the ship begin to fly throughout the entire area. There is a 5% chance
each character will be struck by one of these pieces, taking 1 d10
damage.
If the characters run toward the lifeboats, they will meet no pirates
anywhere; all other beings have abandoned ship.
There will be one lifeboat left when they reach the escape bay.
GAMMA SUBSECTION 4: PLANNED ENCOUNTERS
Review the following information carefully. You must read the
boxed entries aloud to your characters as you begin each encounter,
but it is not necessary to provide them with the information below
the boxed entry unless they have done something to acquire this
information.
1.) BEGINNING
Read the following description to any character:
|
You hear the sound of scuffIing outside your cabin. After the
scuffling continues for two seconds, a man cries
"Help!" A loud thump follows the man's cry. |
The space pirates are hijacking the Serena Dawn. One of them is
attacking a crewman in the corridor. When the characters investigate,
the pirate will attack with his fists. If the pirate is reduced to 10 or
fewer Stamina points, he will surrender (most pirates will continue
to fight until reduced to 0 Stamina points}.
Pirate F (RW -- , M 23, PS 3, IM 4, RS 40, STA 45.)
2.) FIGHT IN THE CORRIDORS
As the characters enter the corridor between the two rows of
passenger-class quarters, read the following description to them:
|
You see three space pirates in the corridor between the two
rows of passenger-class cabins. The first pirate, carrying a
bullwhip, stands at the top end of the corridor. The second
pirate, carrying a club, stands at the junction of the corridor
leading from the airlock and the corridor running between the
passenger-class cabins. The third pirate, wearing shock gloves
and a power belt, is at the bottom end of the corridor. |
Each pirate will attack the first character he sees, and continue attacking
until the character or himself has been reduced to 0 Stamina points.
Pirate G (RW 30, M 30, PS 3, IM 3, RS 30, STA 45.)
Pirate H(RW -- , M23, PS2, IM6, RS55, STA25.)
Pirate I (RW -- , M 25, PS 3, IM 4, RS 40, STA 50.)
Space pirate I wears a fully charged belt pack to power the shock
gloves.
3.) SEARCHING THE CARGO BAY
If the player-characters wish, they may search the cargo bay for
useful equipment. Read the following description as they enter either
cargo bay:
|
You have entered a cargo bay. There are many boxes piled in
every square, with just enough room for you to walk between
them. You can also see several rows of cargo cabinets.
Apparently, these cabinets are unlocked. |
As the characters search each square, roll on the cargo search table
below. All items are stored in clearly marked cargo boxes. It requires
one turn to open a cargo box, and another turn to remove the contents.
Each character may search 1 square per turn. A square may be
searched only once; if more than one character searches a square, the
second will find the same thing as the first.
If the characters have searched all squares in both cargo bays
without finding their skeinsuits, they will find the skeinsuits in the
last square.
GAMMA 4.1: CARGO SEARCH TABLE
% Roll
|
Type of Cargo Found
| Weight/
Item
01-05
06-10
11 -15
16-20
21-25
26-30
31 -35
36-40
41-45
46-50
51-55
56-60
61-65
66-70
71-75
76-80
81-85
86-90
91-95
96-00
| Character's military skeinsuits*
10 Laser rifle clips*
12 Packets of dehydrated food***
1 Computoy
Ship doctor's spare medkit*
Crates of hand axes
Costume jewelry
1 Holographic fireworks
projector
Chronocom
Boxes of ball bearings
Chocolate anchovies in aspic
Steambath perfume
1 Prize Vrusk statue
Characters' non-weapon
equipment
Bolts of silk
Galacticana Encyclopedia
Yazirian punching bags
Large machine gears
Vrusk body wax
High fashion Human dresses
| 1.5 Kg
--
1 Kg
10Kg
4 Kg
1 Kg
--
5 Kg
--
--
--
1 Kg
10 Kg
--
5 Kg
2 Kg
2 Kg
10 Kg
--
--
*Can be found only once.
***Each packet will feed the entire group for one day.
| | |
There is one pirate guard in each cargo bay. Pirate J guards the left
bay, and pirate K guards the bay on the right. Each will stand near the
center of his cargo bay. Both pirates will fight until they are knocked
unconscious or they win the fight.
Pirate J (RW 18, M 18, PS 2, IM 4, RS 35, STA 35.)
Pirate J will fire his gyrojet pistol until out of ammunition, then use
the pistol butt in melee. Assume he begins the combat with a fully
loaded clip.
Pirate K (RW -- , M 30, PS 3, IM 6, RS 55, STA 50.)
Pirate K will attack with his axe until he wins or is knocked
unconscious.
4.) GUNFIRE IN THE AIRLOCK CHAMBER
As the characters enter the airlock chamber closest to the escape
bay, they will see two space pirates.
|
There are two pirates in this airlock chamber. One holds a
grenade, and the other holds a sonic stunner. They move to
attack you immediately. |
The pirates will attack as soon as they see the characters.
Pirate L (RW 30, M 30, PS 3, IM 6, RS 55, STA 55.)
Pirate L will throw his fragmentation grenade immediately. Each
character within the blast radius should make a Reaction Speed check;
any characters who make their checks take only 1/2 damage from the
grenade. One or both pirates may be caught in the blast radius of the grenade.
(Each character should roll damage from the grenade separately.)
Pirate M (RW 25, M 25, PS 2, IM 5, RS 45, STA 40.)
Pirate M will attack with his sonic stunner. Any character hit by the
sonic stunner should make a Stamina check. If the check is successful,
he is not stunned.
5.) RETREAT FROM THE BRIDGE
If the characters enter the bridge area, read the following
description to them:
|
As you open the door, you immediately realize a struggle has
taken place. Chairs, instruments, and even unconscious officers
lie strewn about the floor. You see four armed space pirates on
the bridge. The first holds an automatic pistol, the second
holds a needler pistol, the third holds an electrostunner, and
the last holds a laser pistol. |
If the characters have entered the bridge section with the weapons
locker, read the following statement:
|
From your vantage point, you can see the weapons locker has
been destroyed, along with everything it once contained. |

The pirates have orders to guard the bridge at all costs. They will
open fire as soon as they see the characters. The guards will not
follow the characters if they leave the bridge area.
Pirate N (RW 23, M 18, PS 3, IM 4, RS 35, STA 55.)
Pirate N will fire two shots each turn until he has used the 10 shots
remaining in his clip. He will then use the pistol butt in melee.
Pirate O (RW 25, M 10, PS 2, IM 5, RS 50, STA 40.)
Pirate O will fire two shots each turn until he uses his 10 shot clip. He
will then use the pistol butt in melee.
Pirate P(RW 40, M 15, PS 2, IM 6 ,RS 60, STA 30.)
Pirate P will place the electrostunner on the damage setting and fire
until he has used his 20 SEU clip. He will then use the pistol butt in
melee.
Captain Slag (RW 69, M 47, PS 4, IM 7, RS 67, STA 73.)
Choose any pirate counter to represent Captain Slag. He will fire one
5 SEU shot from his laser pistol each turn until he exhausts its 20 SEU
clip. He will then use the pistol butt in melee.
